
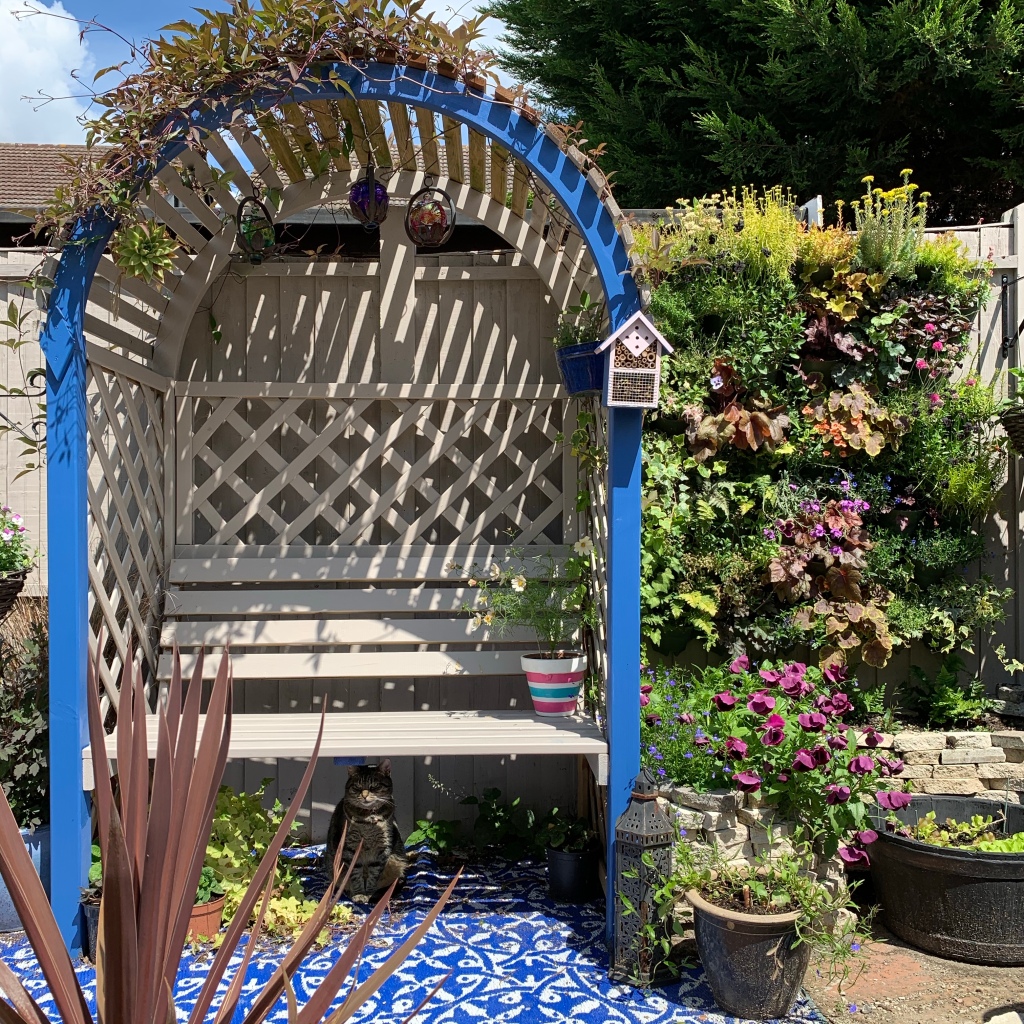
The latest feature to be installed in the garden is a living wall, which I have fixed to a south west facing fence. In just a couple of months, the living wall has completely filled out and transformed the space.

Our garden is blessed with an enormous concrete slab, so nothing can be planted in the ground directly in front of the fence. I had previously had climbers in pots, but I wanted to make a really dramatic feature and combine colour, evergreen foliage and scent.
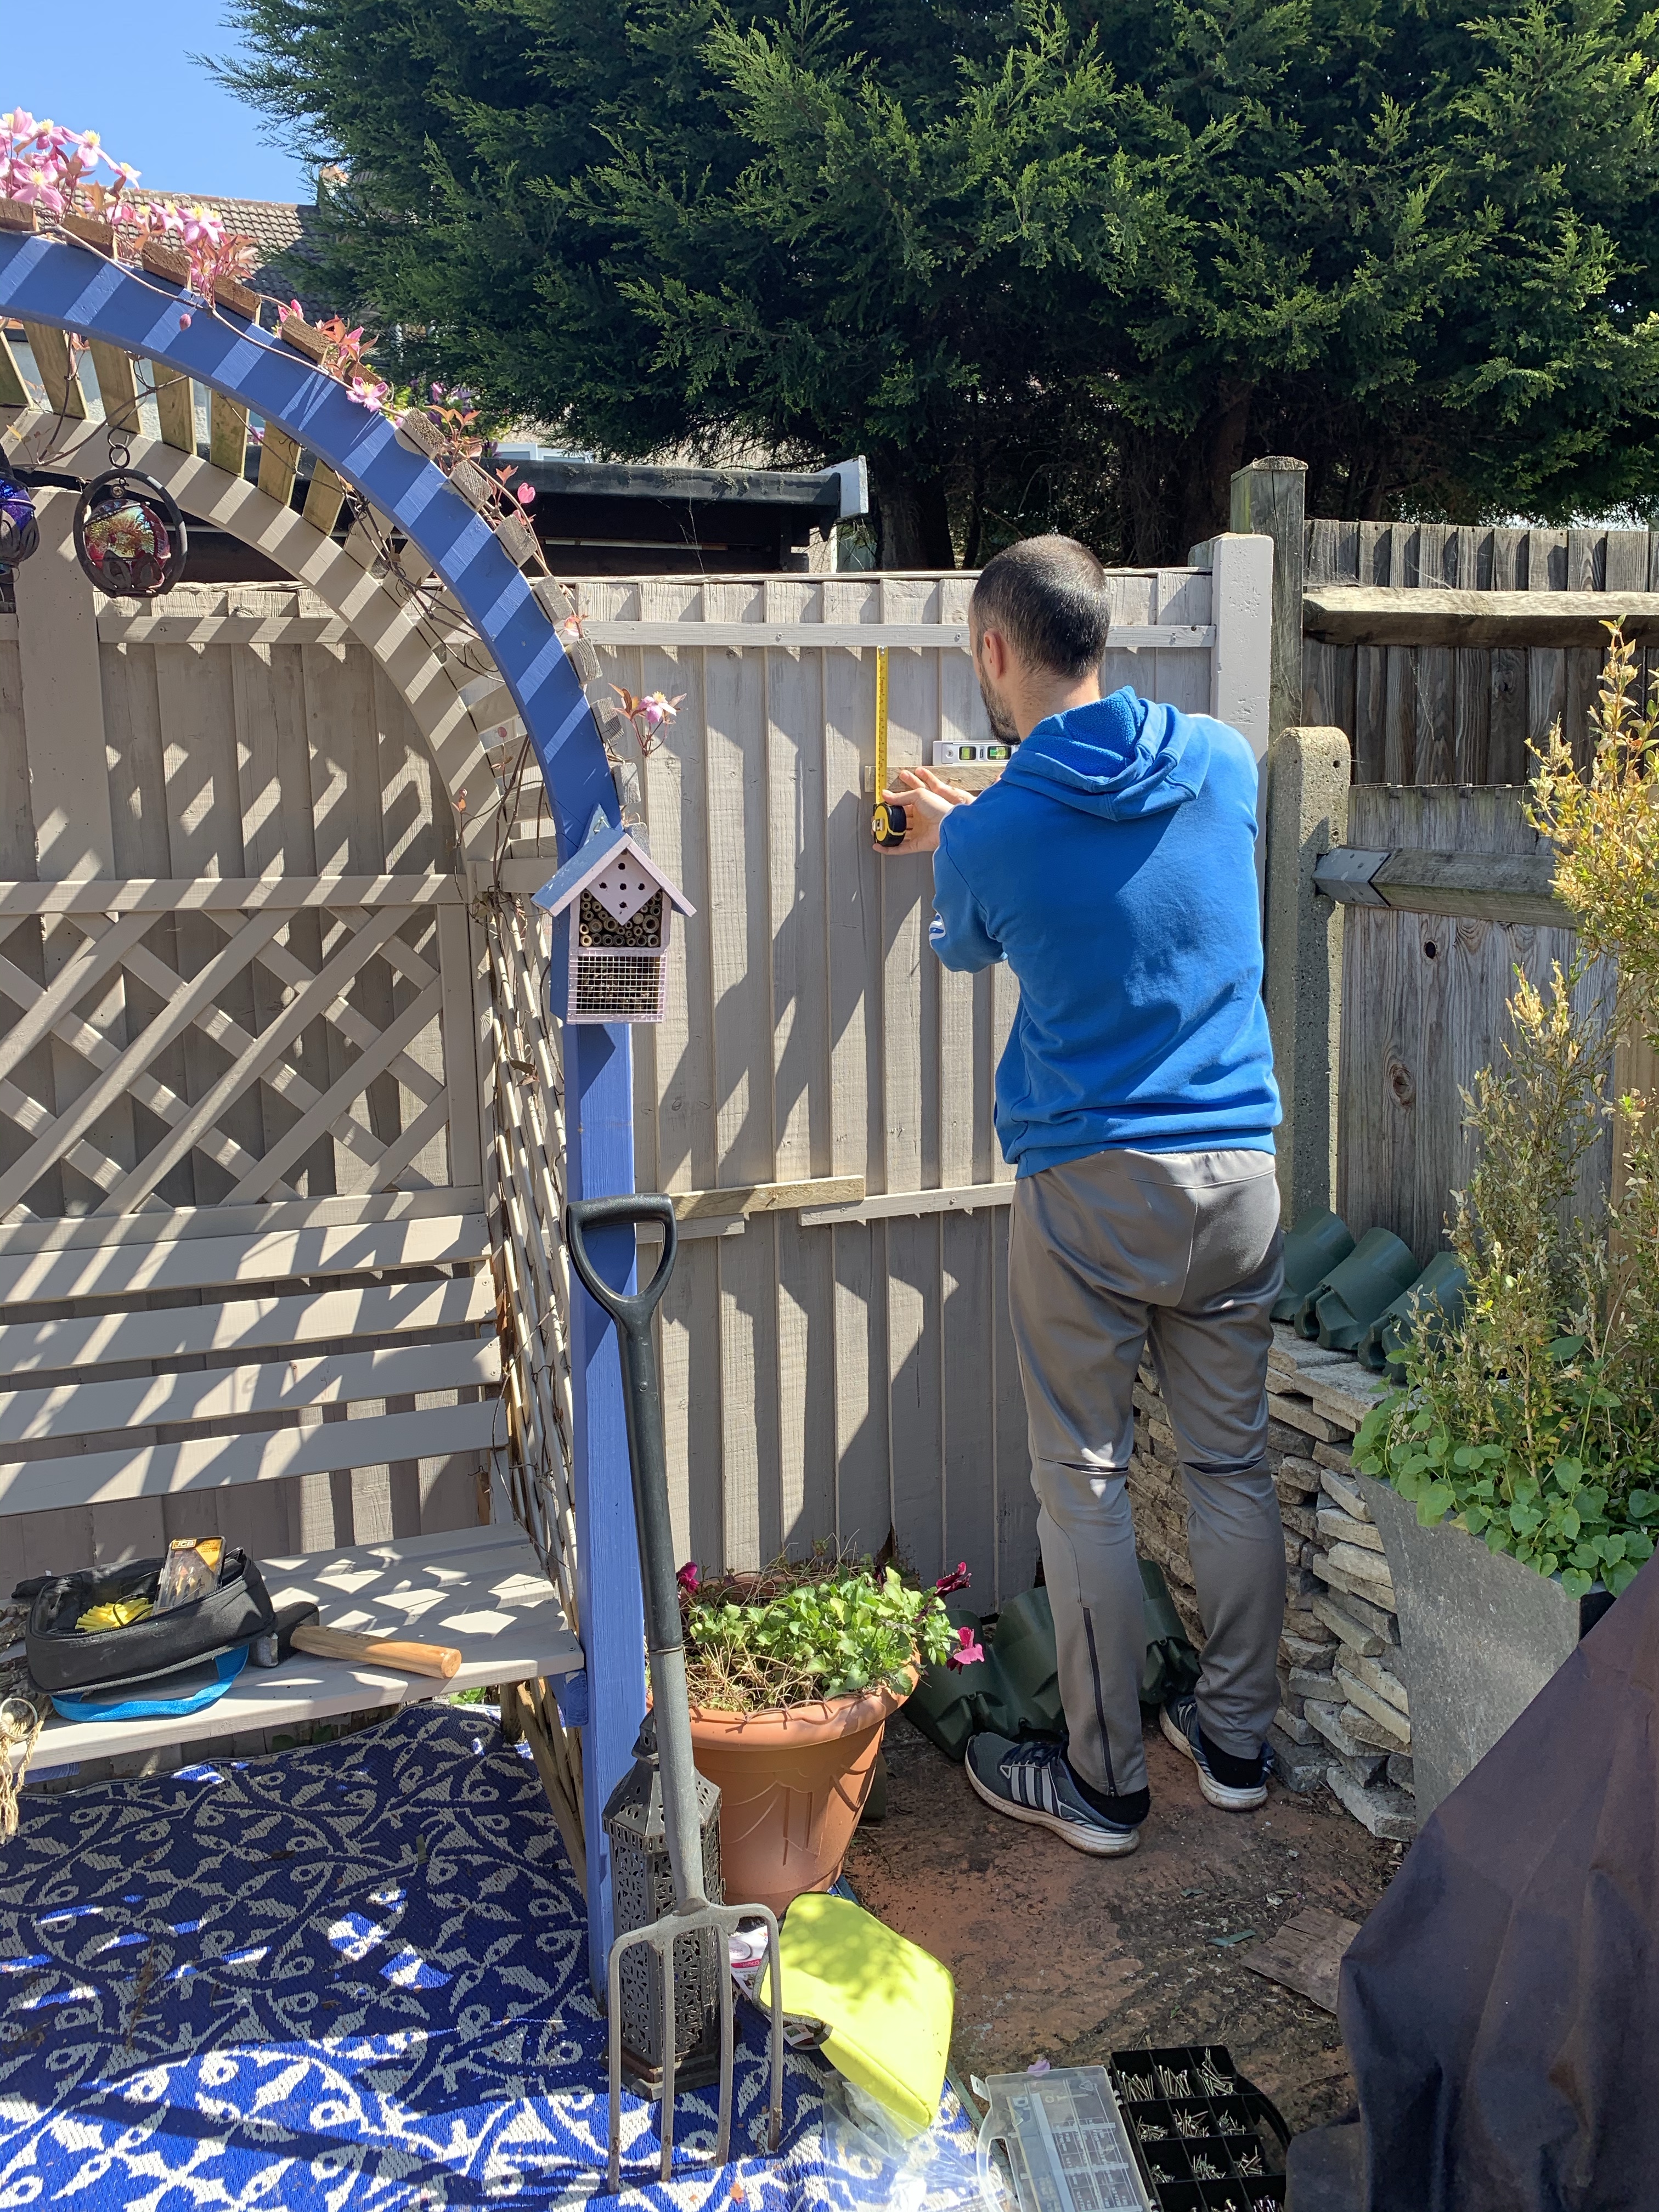
The living wall is a 1m kit from Wonderwall (which I received to review as a PR product). It is incredibly easy to install – Oli put it up in his lunch hour – and can be attached to a fence of brick wall. The kit comes with the fixtures and fittings.

I repainted the fences before putting up the living wall with a weather proof paint. I’d recommend a bit of tlc as they will get wet. You could also line the area first and Wonderwall give advice on this. We did not consider it necessary for this project.

The kit is easy to attach. The wooden battens are provided and you fix these to the fence. You then screw the planters to the battens – they slot together so there’s only a batten every few rows. The planters come in groups of three, so you can attach them in whichever way best suits your space.

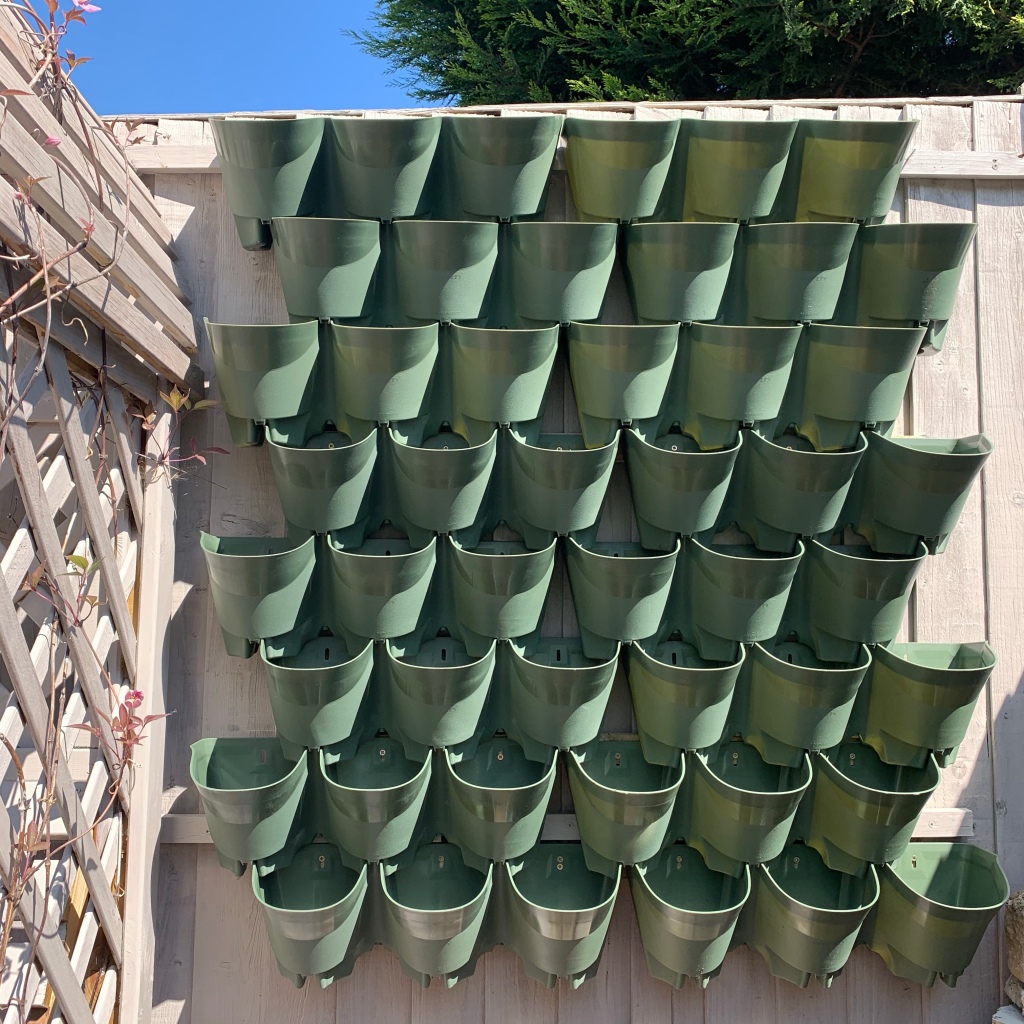
We used the 1m kit to cover this whole fence panel in a square.
The living wall is ‘self watering’ in that as long as it is watered from the top, the water passes down to each of the lower planter rows so each plant just takes as much water as it needs. The bottom row then drains away as with any pot.
You could install an irrigation system for a very large project but mine survives on rain and a blast with the hose on dry days.
The fun bit comes with filling the wall! You simply pop in a 13cm (1 litre) pot and job done. The holder tilts forward slightly so that when all the spaces are filled, you have a tapestry of plants.
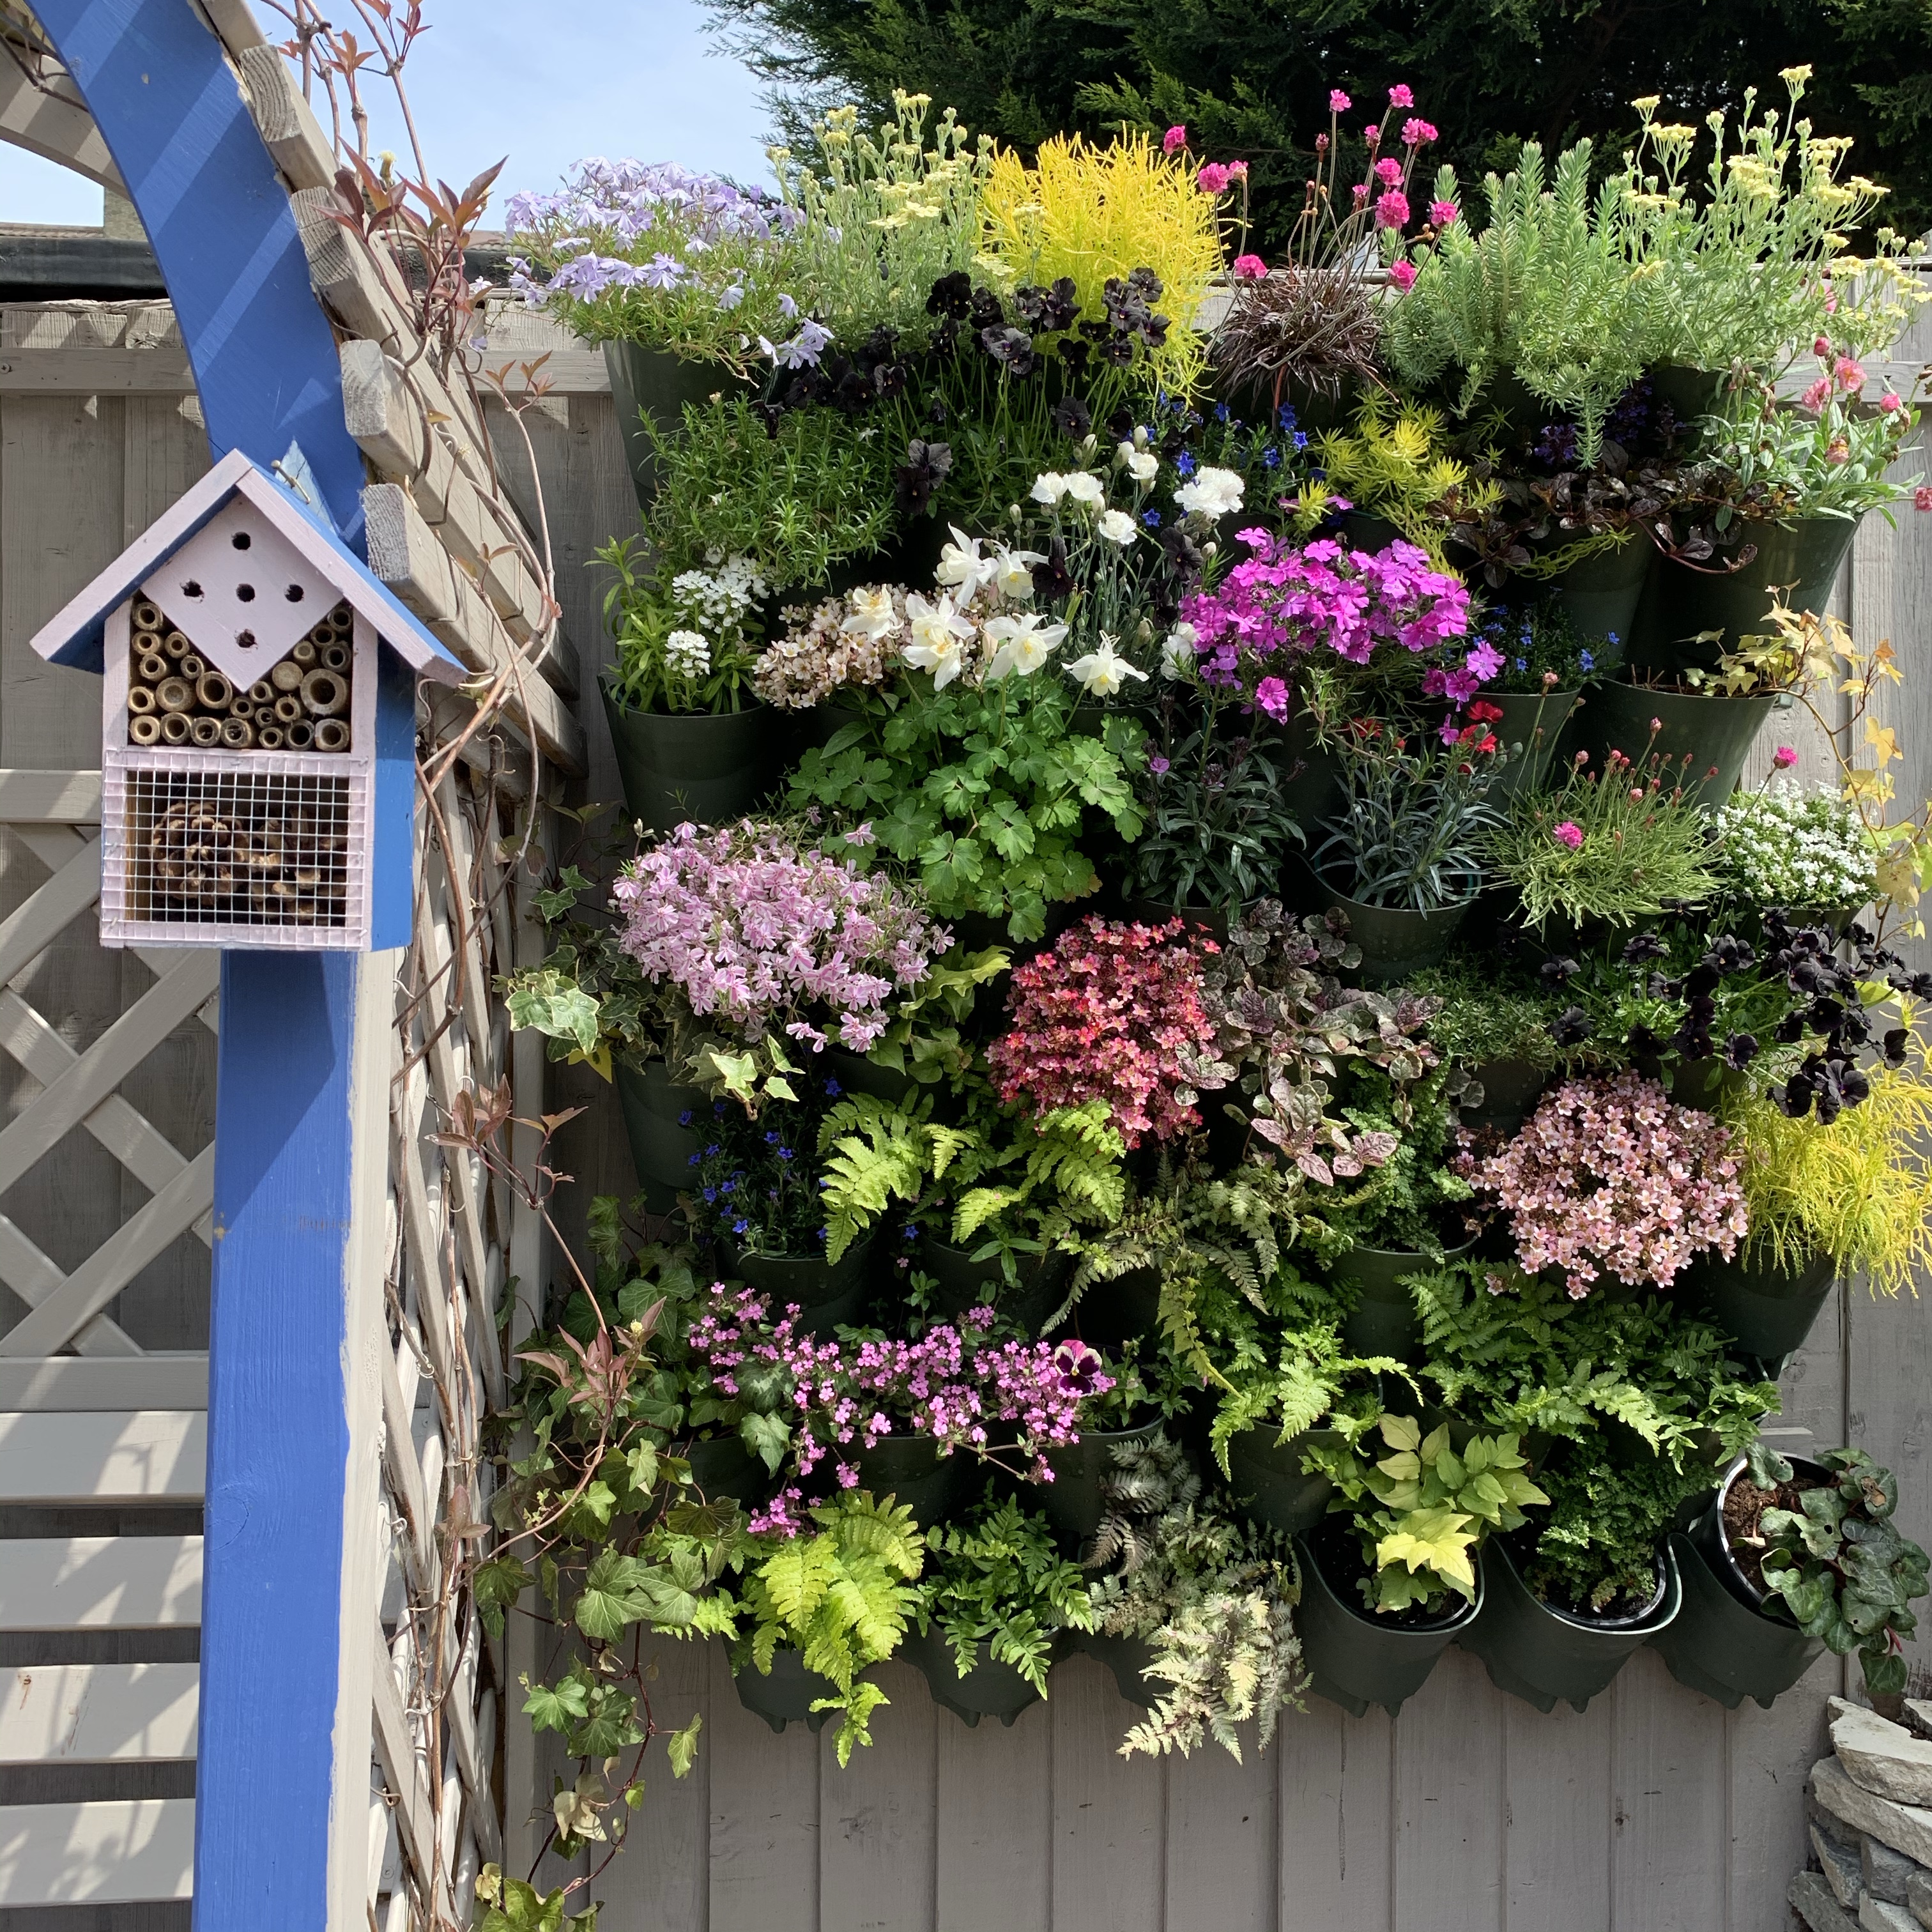
This is how mine looked immediately after positioning my plants, but within a few weeks the plants had grown and completely filled the space.

What plants should you use?
My wall contains a mix of hucheras, ferns, ivy and a selection of alpines. I ordered all of them from Love Gardening Direct and the quality was excellent (I’ve not been paid to say that!)

You’ll need to play around with where to place the plants – hucheras, ferns and ivy like a shadier spot, so mine are in the gaps that are shaded by other plants. The top row is a mix of trailing hardy sedums. The sunnier gaps are flowers like violas. Mine isn’t in direct sun all day but it does get rather blasted at the end of the afternoon. The left hand side is shadier though and so this is where I have put the ferns and ivies.
Your plants will eventually get pot bound (which is when the roots become tangled up because they can’t spread any further). When this happens, remove the plant from the pot, chop the bottom third off the roots (I use a bread knife!) and replace in the pot with a third compost in the bottom. Use fresh compost.
The plants in the living wall will need feeding through the growing season as they will quickly use up nutrients in the pot. They will also need regular watering if there’s not a lot of rain to sustain them.
Other ideas….
Why not use your living wall as an edible wall? Cut and come again lettuce leaves, alpine strawberries, rocket and all sorts of herbs will happily grow in the wall.
Place Mediterranean herbs such as basil, rosemary and thyme in the sunniest spots and plants happier in a cooler spot such as parsley, chives a mint in the shady spots. It will smell wonderful and make cooking a delight!

